The top contestants achieved very high win/lose ratios. Could someone tell me what they did to get such good results?
1 Like
I’m sure everyone is eagerly awaiting the finals video to get released, where you will be able to see ship placements and probably piece together some strategies, but I can tell you what I did.
TL;DR : I focused a lot of my shots on the edges, as I saw from the 2nd battle that the preferred placement was around the edges of the map.
There is a lot of mention of the Heat map strategy in here. If you are not familiar with it:
http://www.datagenetics.com/blog/december32011/
And now for the long:
My bot would Search until it gets a hit, then when 1 or more hits are made, I would finish off any ships I had hit (although I’m sure pretty much everyone did this)
I would start off by firing shots on the outer rim of the map (In random places on each edge). I had a weighting system, where I had a starting value of 100 for the outer rim, and 75 for the next rim in (picture below). if I miss a shot on a rim, I would subtract 2 from the score, and if I hit I would add 2 to the score. If the value of a rim drops below 50 I would abandon this part of the strategy. I would fire a shot at an edge that had the most chance to have a ship on it (calculated using a heat map) of the edge with the highest score (until both drop below 50)
<img src="/uploads/db1882/original/2X/e/e705acdc107a349e1258c6005fa9c19dff4ae87e.png" width=“232” height=200">
While doing this I would fire a seeker missile whenever I had energy to do so. I used the same type of heat map algorithm to find the best place to shoot. Although I did not randomize between locations that had equal values, so I mostly ended shooting from bottom left the moving horizontal, and then vertical. In hind sight, maybe randomizing or prioritizing certain areas might have worked better.
If both rim values were below 50, I would use a heat map to calculate the next best shot (so this would normally shoot towards the center of the map). Of course if I hit a shit that I missed and some of it’s squares were in the rims, then this would add again to the score of the rim, which means I might shoot a rim again after I finished off a ship.
As far as special shots went, I would prioritize them in the following order, so if my ship was still alive, I would save up energy until I could fire the highest priority shot, and obviously as my ships died the priority would drop to another ship.
Seeker
Corner Shot
Cross Diagonal
Cross
Double
I put a lot of weight on the Seeker missile. I thought this was one of the most powerful shots, as finding a ship was the most difficult thing to do, and with some extra effort you could really get a lot of information from a seeker missile which I will discuss after my ship placements.
<img src="/uploads/db1882/original/2X/5/5c1e4a93764f6fa8884065b8877cad44ca0ba94a.png" width=232" height=“200”>
I placed my ships in a cluster to try and “hide” my submarine (right in the center of the placement). I figured most people would use some sort of heat map strategy, and with this placement I could potentially save my sub until the very end, as after they hit my other ships they would normally abandon that area of the map. This placement was also very good against a seeker missile, before the buff to it before the final battle (where it would not hit sunk ships anymore), but I decided to stick with this placement anyway. The problem with this placement was that it exposed at least 2 of my ships to easy hits with a simple heat map strategy.
Now the seeker missile. As was mentioned in a post on the forums, you could actually trace the order in which the game engine checked squares for a hit, so by following that pattern, you could eliminate a lot of squares from play, even if you hit a ship. Of course if you miss completely it’s not even that bad, as you get to eliminate 15 squares from play. The sequence in which the missile checked is shown below
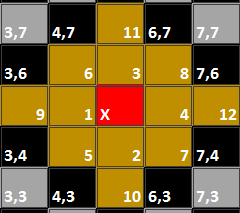
So if you get a hit say on the 7th square checked, you know that there is nothing in squares 1-6 (and obviously the center of the shot as well) so you can mark them as missed. This really helped optimize my search strategy. There was a case with a shield deployed when you fire a seeker that would break this and actually cause my bot to fail completely, but I did my best to avoid this, and it was also extremely unlikely that someone would randomly deploy their shield at the exact right place and time, so I won’t even go into it here.
The other shots were pretty basic. The only hard part was knowing when you have more than 1 hit, especially when it’s 2 different ships. Will discuss this near the end.
Shield:
The shield was great as that last resort to try give yourself some extra time to finish off your opponent. In hind sight I think my shield strategy was actually quite poor for the top 8, but here it is:
I would deploy my shield after any of my ships are hit if it has been 2 or less rounds since my shield gained a charge. The reason for the limited time frame was that if you deploy your shield all your progress towards a new charge would reset, so this was to try and “waste” as little as possible rounds. I did this as an attempt to confuse bots, where they would maybe malfunction or forget about my ship, but like I said in hind sight this was probably under estimating my opponents, especially in the top 8. The most optimal strategy was to wait until you have 1 square left of your last ship, and then deploy the shield. It would give you the most possible charges you can get without wasting anything, and also, if you deploy a shield, any good bot would ignore that ship until the shield dissipates and continue seeking for another ship (which is what I also did).
That’s pretty much it for strategy. I made very sure that my bot would finish off ships efficiently once found, so I put a lot of work into this. Just making sure that if you hit multiple ships that all of them would get finished off. I did this by keeping track of hits in a list, and when I see I have sunk a ship I would trace back to see what I sunk and the position of the ship. Also splitting the hit-list if I notice I am firing at 2 different ships, and then finishing them off one at a time.
Testing.
This was a very large part of the time I spent on this bot. I modified the engine so I could run bots vs each other without outputting to files each time. This allowed me to run over 10K matches during the night. I also made a replay viewer that I customized to see the kind of information I was interested in. Things like win/loss ratio, and quite specifically and exceptions my bot would throw. There were a lot of situations where my bot would break, that I don’t think I could have identified without the use of the modified engine and replay viewer. I don’t do AI as part of my daily routine, so maybe there are better ways to do it, but running these tests not only allowed me to identify flaws in my bot, but also helped me test strategies (although I could only really test them against myself).
That’s about it I think.
@MajorPAIN - thanks for sharing! I found it very interesting. Where did you come, though? Also your images don’t work - hope mine do.
I wasn’t in the Top 8, and didn’t have one of those super-high win/loss ratios, but I would find it interesting to see what players all over the leaderboard did, so here follows my (long) writeup. I came 12th in the final round.
When making my bot, I focused (far too much) on making the best possible bot against a random ship layout, and almost not at all on how other players would lay out their ships - in retrospect I think this is why I couldn’t break out of the group behind the leaders.
The Simulator
I started with a simulator that, when given the state of the board (hits, misses, which ships were still alive, and the location of the sunk ships, if available), calculates the probability of a ship being on each square (assuming that the ships are randomly distributed). When three or more ships are still alive, it uses a Monte Carlo simulation, and when two or fewer ships are still alive, it generates all possible positions of those two ships.
The Monte Carlo simulator was probably over-engineered (but then, so, probably, was the whole bot!) and was written using multithreaded C++. It could simulate 15 million possible ship placements in the allotted two seconds, towards the start of the game. Of course this is excessive for most board states, though sometimes, when the board was heavily constrained, fewer than 10 of those would be valid. I could have had it stop once a certain number of valid boards were found, but because it only ran in the middle part of the game, and didn’t affect the accuracy of the bot, I left it.
The Visualiser
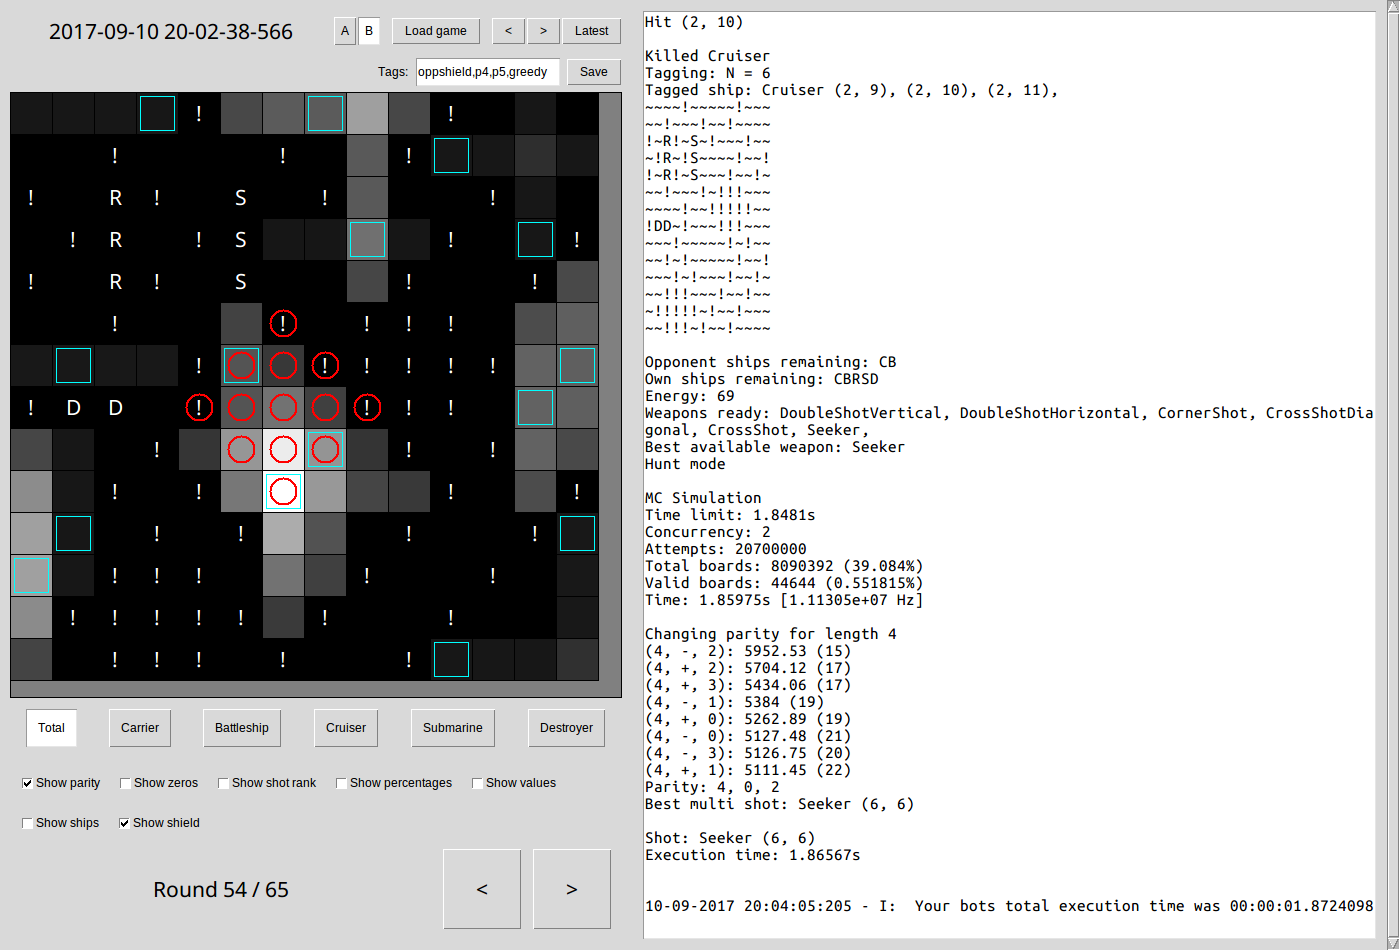
I made a custom visualiser (using Python and tkinter), that read specially-formatted data that my bot wrote to the log file, and showed the state of my opponent’s board, as well as my bot’s text log. Here you can see an example game. The greyscale shades indicate the probability of a ship at each square.

Ship Placement
I placed my ships mostly around the edges (each assigned a random position in a certain “ring”), with the Cruiser (the most expendable ship) in the centre to throw off opponents who started on the edges. I think I significantly underestimated how many people would do this!
In the first and second rounds the ships were a bit more towards the centre.
I avoided certain squares (“L” shapes in each corner plus the “middle” areas on the outside of the board), and made sure that my ships were never touching (to avoid a kill algorithm killing two ships at once).
This is something I gave very little thought to, compared to killing the opponent’s ships.
Here’s an example of my bot’s ship placement (in blue).

Modes
The bot has four modes: opening, hunt, kill and last kill. Opening I’ll describe in its own section. Hunt mode is for searching for ships. When there are ships hit but not sunk, it is in kill mode (and when the ship hit is the last ship remaining, last kill mode).
Parity
In hunt mode, at the start of the game, the bot only shoots in every second square. Whenever the smallest ship on the board is sunk, it recalculates the parity, shifting the grid size to the new smallest ship, and chooses the sum and sign (offset and direction of the diagonals) based on which will give the highest average probability per square it covers.
In kill mode, it prefers parity squares, unless the best parity shot is a certain ratio, R, less probable than the best overall shot. It does this to save shots: if it shoots directly adjacent to a hit, it will have to come back and shoot the parity squares later. This trades off a slightly slower killing time against improving the hunting time later in the game. I set R after viewing lots of games and showing the parity shot:shot ratio, as 0.55.
Here you can see the parity squares remaining when only the Battleship and Carrier are left:
Shot Selection
In hunt mode, in the first round, it simply ranked the parity squares by probability and shot at the highest probability square. When the multishot weapons were included, it calculated the sum of the probabilities for each shot of each available (enough energy) weapon, plus the best overall weapon, divided by the energy needed to fire the weapon. The best overall weapon is the weapon with the most parity shots per unit energy, and is close to constant over different parity sizes. (Seeker, DiagonalCrossShot, CornerShot, CrossShot, DoubleShot) If the shot with the highest probability per energy of all of these was available, it took it. This made sure that it waited to use the best weapon, while still being able to override that if one of the other weapons could do the same job more economically.
For these calculations, it assumes that all the Seeker shots will miss. When calculating the actual result, it uses the fact that in the case of a hit, all closer squares must have been misses. I didn’t use the exact order that some people worked out, as I think it relied on an implementation detail that wasn’t guaranteed, and I wanted to make sure my bot was never stuck in an impossible situation.
I also disabled certain multishot weapons based on the opponent’s probable shield state, more on that in the section on shield prediction.
In kill mode, except in last kill mode, multishot weapons were disabled, on the grounds that they should be saved for finding ships, which is a much harder task than killing them. This is the only difference between kill mode and last kill mode. Only shots in the same row and column as a hit, less than the longest ship’s length away, and not blocked by any misses, are available to shoot at. The highest probability square among these is chosen (subject to the parity ratio explained above).
Opening
In the first round, I noticed that the “greedy” approach of always shooting the highest probability parity square led to local minima, and this was made worse by the need to reserve an area for the first Seeker shot. So, from the second round onwards, the bot has a hard-coded opening sequence, up to the firing of the first Seeker, which it follows until it runs out or hits a ship.
I tried a few methods to come up with the opening sequence. I judged them by the percentage of possible boards (using the Monte Carlo calculator) which had all the opening squares as misses. The final opening I used is only all misses for 4.08% of randomly-generated boards.
The completed opening sequence:
Ship tagging
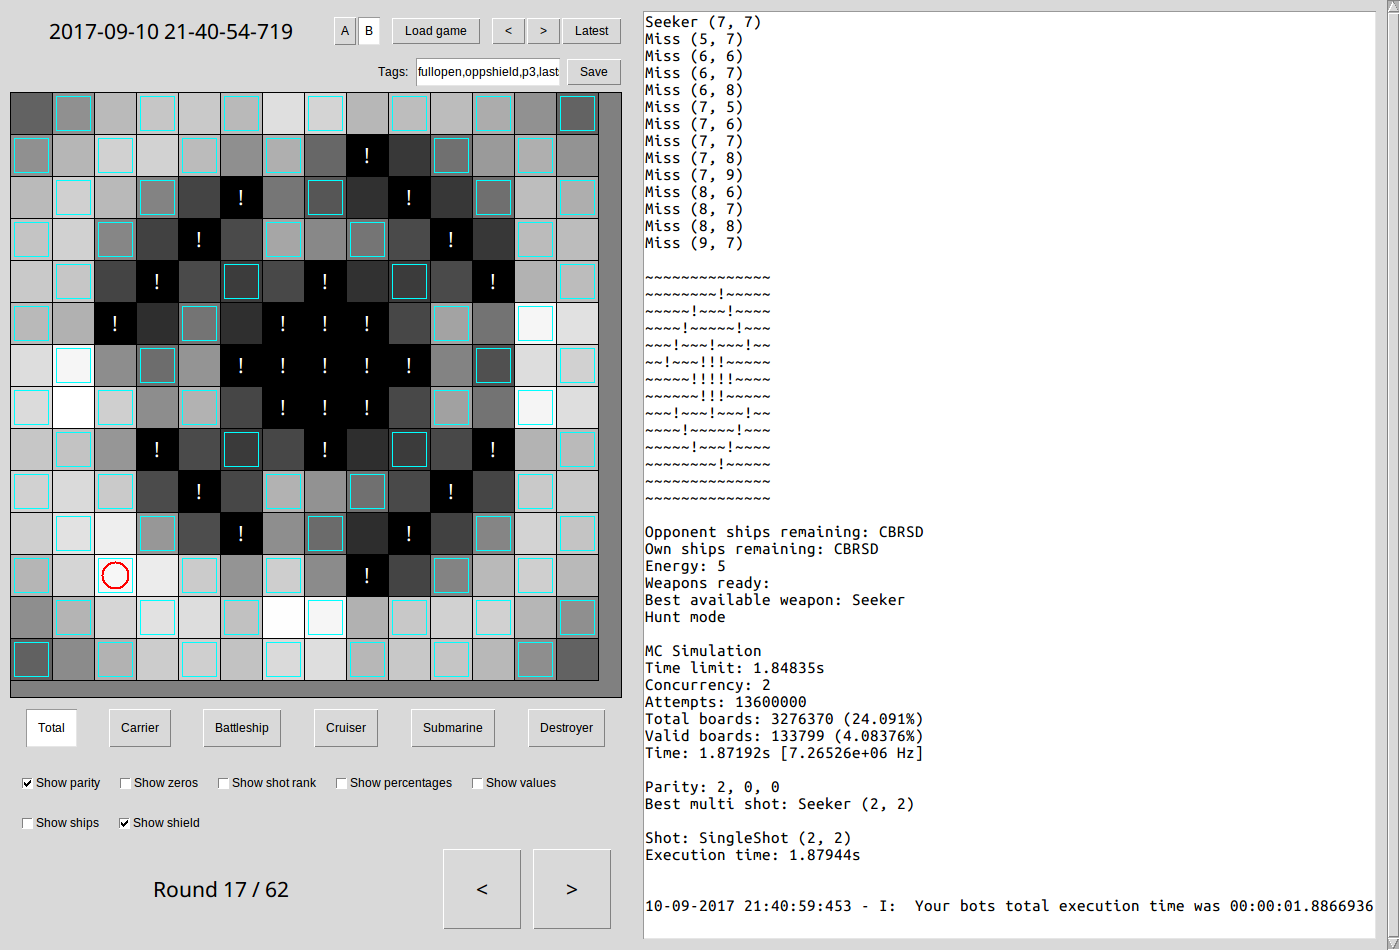
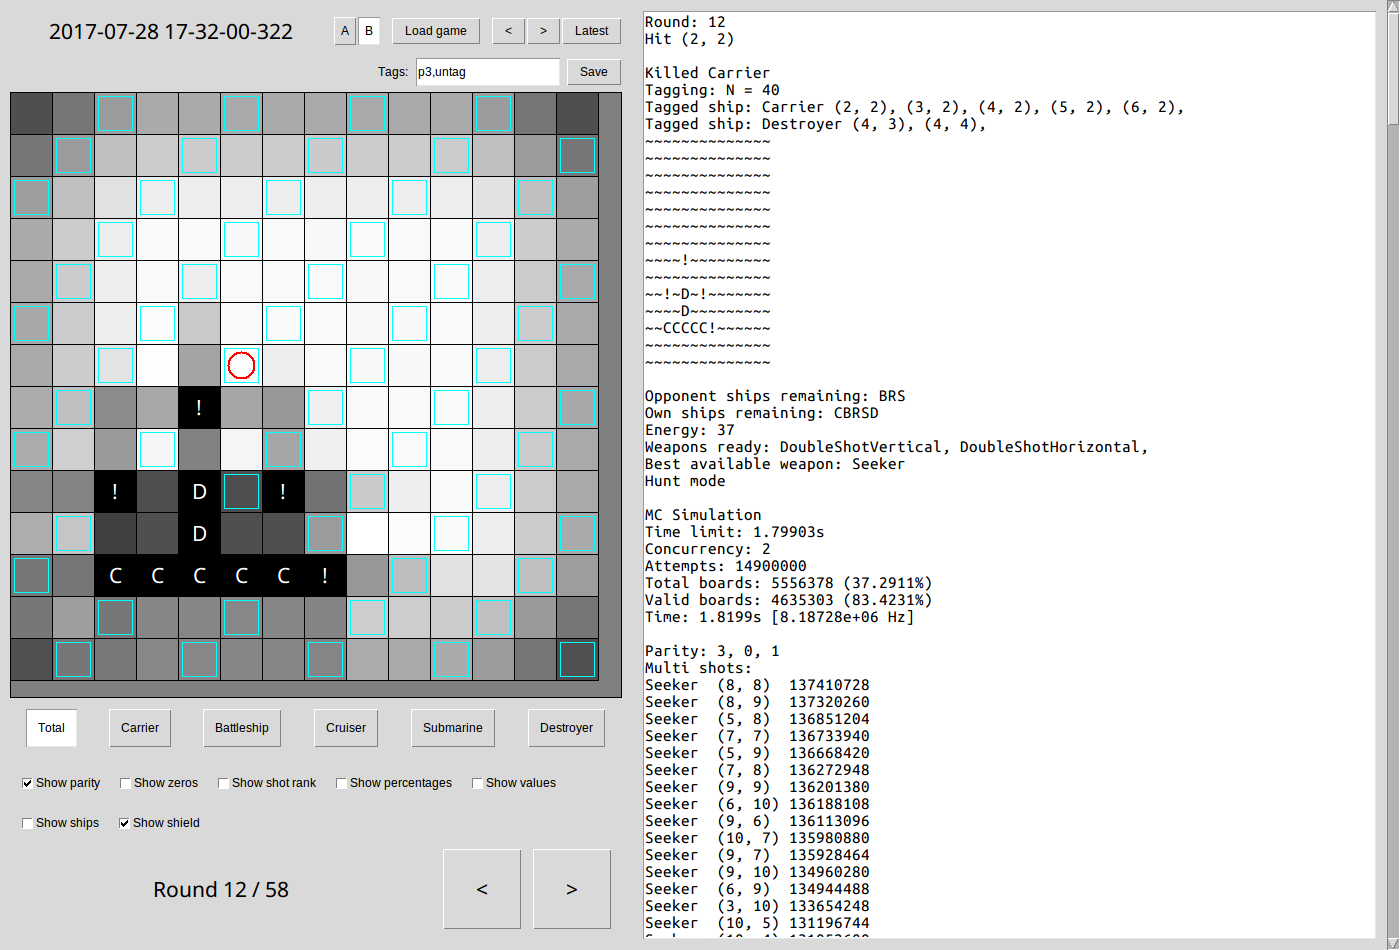
To simplify the Monte Carlo simulation, I recorded the location of sunk ships, and excluded them from the simulation. Because the shot, made in the round before an opponent’s ship turns from alive to dead, must have hit that ship, the position of the rest of the ship can almost always be uniquely determined, by trying all possibilities around the definite square. There are cases where the situation is ambiguous and ships remain untagged, but these are normally resolved after sinking the next ship, and the bot handles these too.
Here is a situation in which the position of the Destroyer can’t be uniquely determined (the previous shot hit the square marked “D” and sunk the Destroyer), and then both Destroyer and Carrier uniquely determined once the carrier is sunk.
Shield placement
A shield is placed for two purposes:
- To interfere with the opponent’s first Seeker
The Seeker is the most valuable weapon, but if it is fired when there is a shield on the board, the opponent must either discard almost all the Seeker’s miss squares, or risk marking a square containing a ship as missed. My bot predicts (based on the opponent’s assumed energy, whether the opponent is busy killing a ship, and whether their submarine still exists) when the first Seeker will be fired, and places a shield in that same round. Hopefully I caught MajorPain with this (and others)!
- To protect the most valuable remaining ship, if it is the last ship, or protecting it will cause it to be able to fire again
The most valuable remaining ship is the ship carrying the most valuable weapon, in the order given above. When the ship has one square left to kill, if it is the last ship, or if the number of rounds the shield will be active for is enough to allow it to fire its weapon again, it protects the ship.
Shield detection
In each round, the bot detects whether there definitely is, possibly is or definitely isn’t a shield present in each round. The inputs to this algorithm are the “no shot” history - rounds in which the opponent didn’t fire. This is either caused by the DoNothingCommand, firing on the same square repeatedly (e.g. a shield), firing a Seeker centered on an already-hit square to eliminate the squares around it, or placing a shield.
No shot rounds are possible shield placement rounds. Hitting a shield, and that shield then disappearing, is the information used to confirm or “disconfirm” that a shield was actually placed on each of the no-shot rounds. This is done by simulating the opponent’s shield charge and radius in each round, for each combination of shield placements. Certain combinations will be impossible, and any no-shot rounds where a shield either must or mustn’t have been placed are marked as such.
This information is used for a few purposes: if there is definitely a shield present, all multishot weapons are disabled, to avoid wasting them. If there might be a shield, the seeker is disabled until this is no longer the case. If a possible shield is placed in the same round the bot fires its Seeker, the seeker shots are discarded, but are stored for later in case the algorithm shows that a shield definitely wasn’t placed in that round, in which case they are re-added.
I intended to use the probable extent of a definite shield (and shoot in other areas instead until the shield dissipated), but by this time it was too close to the deadline. I expected that most players would shield their last ship, and so there would be nothing else to shoot at. Plus, with all the round additions by code’s structure was very convoluted by the end!
You can see some of the output of the shield detection algorithm in the text part here:

I really tried to make the images work, including uploading them to Imgur and linking them, but the forum software seems to have determined that images should be broken rather than working, and keeps rewriting my links!
Nice write up. Very detailed. I only had a very broad overview of the strategy.
It’s a pity about the images, becuase it would add a lot of value to both of our posts. I remember I had the same issue before, but I cant remember what had to happen for it to show the image.
I ended up 3rd in the final round and finished 4th in the top 8.
The images uses the website’s ip address. This gets blocked by your browser, because the ip address is not part of the ssl certificate. You can see the ip address in the url in the address bar when you open one of the images in a new tab.
If you go to https://52.166.79.61/t/curious-very-high-win-lose-ratios/259/3 you will be able to see this post with all the images. You will get a warning in your browser that the website is not safe because of the certificate.
Here is an overview of what I did for those interested. Sorry for the lack of pictures, here is an emoji 
Placement strategy:
I basically placed 2 ships on the sides (avoiding the corners). Two bigger ships further from the sides to mask the side ships from seeker missiles and one randomly in the middle. If people started at the sides the middle ship buys time. if people started in the middle, the side ships buy time. If people started at sides then switch to heatmap, the other two ships will buy time.
Shooting strategy
I also used a heat map strategy, by looking at all possible positions where the remaining ships can be placed (pick one at random in case of a tie). When I hit something, I will add extra weight to surrounding squares so that I can use the same algorithm as for seeking. If two shots are hit close to each other, I will give a bonus weight to the squares that follows the two in a straight line, since it is less likely people will place ships next to each other. When a ship is sank I will look at my last shot and the ship that was sunk to determine and record where the ship was. Sunken ships are treated as missed shots when calculating the heat map.
For the special weapons I will calculate the best shot by iterating through each square the shot will hit and adjusting the heat map after each square as if that square was a miss (summing the heatmap values at the squares). I would not use special weapons during hunting, since it can cause an incorrect calculation when determining the location of a sunken ship. On the last ship I will use special weapons.
I prioritised seeker since it can potentially eliminate the most amount of squares. I did the same as Malman with the seeker, since the ordering was not guaranteed, but the groups of ordering was.
Shielding strategy
I went for the guaranteed block, by placing the shield on the last shot the opponent requires to win. This insures that my shield isn’t wasted and it will keep getting charges until the last possible step. It might have been more effective to use the shield to block special attacks, but then you needed to know when a special attack is used and where it will be used. The guaranteed block was the most reliable.
Results
I ended up 1st 2nd 2nd 8th. Even if my bot may have been statistically slightly stronger, according to the win loss ratios in the qualifiers, it does not guarantee wins as shown in the finals. It is like flipping a coin with the odds of heads showing up is 55%. Round robin has too few games, when you play with such close odds. It does make it more exciting to watch thou.
Well done @MotoGrimler! You seem to have had one of the best few bots (in spite of 8th place in the final).
I agree about the inherent randomness in any one game. It is a pity that the tournaments didn’t use a best-of-N-games style to determine the winner between each pair of players. Of course this might have required N times as many servers!
What do you think your edge mostly was? The placement of the ships?
1 Like
I ended top 6 in all events. For a very good strategy. I believe optimum strategy is needed with regards to both offense and defense.
I will not place images as most people’s strategies covered most of the info. But here is my tactic for this year.
Offence Placements
- Since most bots would make use of the Heat map to attack tiles with potentially the most possible combination of ships. I placed all my ships in the outer 2 rows. I assumed that the outer layers will be the hardest to cover. And if a person attacks the outer layers first they would surely waste a lot of time and any half decent bot with ships in the middle would beat them.
Regarding attack:
I treated about 68 tiles in the middle as already hit. I assumed that 90% of players will place their ships around the edges. I also doubled the heat score on the edge tiles so that I slightly prioritize side ships.
This caused a problem against MajorPain who is a MajorPain… He beat me both times and Im sure in 100 matches he will beat me every time. Just his placements are my weakness. I never find his sub hidden in his other ships.
Anyways,
Regarding weapons.
I mentioned that I ignored about 68 center tiles. Those tiles were handled by my weapons. By reserving them for weapons for the first 70 rounds, After which most of my games were finished anyway, So thats how I used my weapons. I also tried to use the seeker in places where ships were least likely to be. As to me a miss with the seeker meant more than a hit in the long run. Unless I hit another sub.
Shield, My Ace.
I was surprised to see other finalists who misused their shields. The optimum use for the shield was to save it for the very last tile of your very last ship. I know for a fact the person who won (Ryan Louw) did this. A few people might have beaten him if they made use of this logic. In the finals the shields were often wasted.
But then again, I used my shield well, but others might have been better with the other aspects of their bots.
That is pretty much what I did. I went for the highest heat but set some boundaries and left a vast part of the map for weapons only. This gave me a large advantage as I didnt need to search the entire map. By saving the shield for last I could also increase my survive ability by almost 10 rounds. A handy trick many missed
I thought I would answer as one of the finalists. You could have built a perfect bot that lost to bots that built against perfect bots, the question, what would they do was surely a large factor when building my bot. The perfect bot going by math starts attacking in the middle and places their ships on the edges. So a bot that attacks the edges first and places their ships on the edges will break the perfect bot. This was common behavior for the bots in the top. They didnt really care about the middle that much. Which is where many tutorials on Battleship AI starts.
Well, thats my input,
1 Like
I heard my name, thanks @WillieTheron. Here a brief summary of my final bot.
My placement strategy changed drastically in the last round. I moved from a random outer rings placement to a fixed placement around the outer edge. I wonder if the exact locations I chose had any impact. Anyway, one ship, the battleship, was excluded from the outer ring and was placed halfway to the middle. This was to satisfy opponents attacking from the middle, and to buy me time from those attacking from the outside, and this is what I think helped me a lot and resulted in no losses for me in the finals. But it was close. Very close.
My shooting strategy revolved around searching(in the outside first, slowly moving in), and hunting after a hit, with special weapons(weighted by preference and cost/hit) only used when searching. Searching was based on a heatmap, with parity, hunting worked with a localised heatmap based on the orientation of the hits, without parity.
When using the seeker, I would add ‘heat’ to areas around the middle to clear the area if the seeker missed. I considered hardcoding the areas, but by just adding heat allowed my bot to use its own judgement in choosing the exact spot. I relied on the ‘fixed’ searching pattern of the seeker in case of a hit to clear more tiles that were ‘missed’. I don’t think my seeker hit anything in the finals, cant remember now, need to look at the replays(cc @Wackymax). Anyway I spent a lot of time to determine correctly which ship was sunk, and what to do in the case of ships touching, and multi hits with a special weapon.
My shield worked like @WillieTheron mentioned. I waited until the last moment to deploy. I ensured that the full shield was on the map, even when I was on the edge(implementation detail, not useful in the endgame where I ended up using it.)
I handled opponent shield hits by blacklisting an area around it to avoid subsequent shield hits(actually found a bug here just now…), and clear other areas of the map. When a shield was active, no special weapons would be used.
In the end I went from 30th(45/28)>23rd(66/23)>8th(80/14)>1st(4?/0)! I was not impressed with myself only climbing 7 spots in the second round, so I invested a lot of time in the third round, and it paid of.
This was certainly the most fun challenge presented to date, I enjoyed it a lot. Thanks Entelect for this awesome community engagement event! I hope we see the same growth in competitors next year!
One suggestion: at the finals event the round counter on the visualiser displayed the total number of rounds. This took suspense away as one could easily predict the winner closer to the end. I think in the future only display the current round number and not the total too.
Edit: My bot was done in C#.
1 Like
Hi
I ended up 4th in the final round robin round and 2nd in the top 8 finals. Sorry just quickly putting this reply together, so no fancy graphics and it may be hard to follow.
With my heatmap I added an edge modifier that would multiply the square value based on how close it was to an edge. It was two numbers, a base multiplier and the number of squares away from the edge where it would reach 0. For example if I chose 1 base multiplier and 3 as the number of squares away, the edge would get the full 1, one square in would be 0.5 and the third would be 0. From that I would calculate the modifier for that square and multiply it by 1 + modifier, and do this both for x and y. This resulted in a weighting towards the edges and specifically the corners.
I played many games fiddling with these numbers, ending up with 0.7, 6.
My weapons would get an overall heatmap by adding all the squares they would hit divided by their cost and multiplies by a weapon modifier. Again I played with the modifiers over many games and came up with a final combination that seemed to work best (I don’t have those on my right now, will have to check the code at home).
Finally I needed to run a lot of test games. I set up a ram drive, turned off the anti virus, and ran versions of my bots against each other (C++ bots). With this setup on my old i5, an entire match took 6 seconds, so I was able to run a lot of matches. I thought about redoing the bot runner in c++ but was worried I’d introduce a bug that could lead me astray. 
For those looking for a new challenge, Halite II seems like a fun AI challenge. Check it out at https://halite.io
We need more South Africans!
Going to spam a few threads as I dont think anyone is watching the forum for new threads. Forgiveness asked if you receive duplicate notifications.